We added 4 new colors to our line of Glitter Cardstock this year. Today we created this cute explosion box using one of the new colors, a pastel blue. We did a baby shower theme, but you can change up the colors and decorations to fit any occasion... from party favors, to a birthday gift box, or even to ask your BFF to
be your bridesmaid! Follow these instruction to make your own!
Materials
Best Creation Glitter
Cardstock GCS064 and GCS013
Best Creation Foam Tape Squares FT001
Best Creation Basic Glitter Papers BGP203 and BGP204
Yellow and White plain cardstock
Design Paper to use for final decorations - any theme depending on your occasion
Tools
Ruler
Die Cut Round
Glue
Bone folder
Rotary
Trimmer 17”
For the Box:
 |
| Step
1. Cut the Glitter Cardstock GCS067 (12”*12” ) |
 |
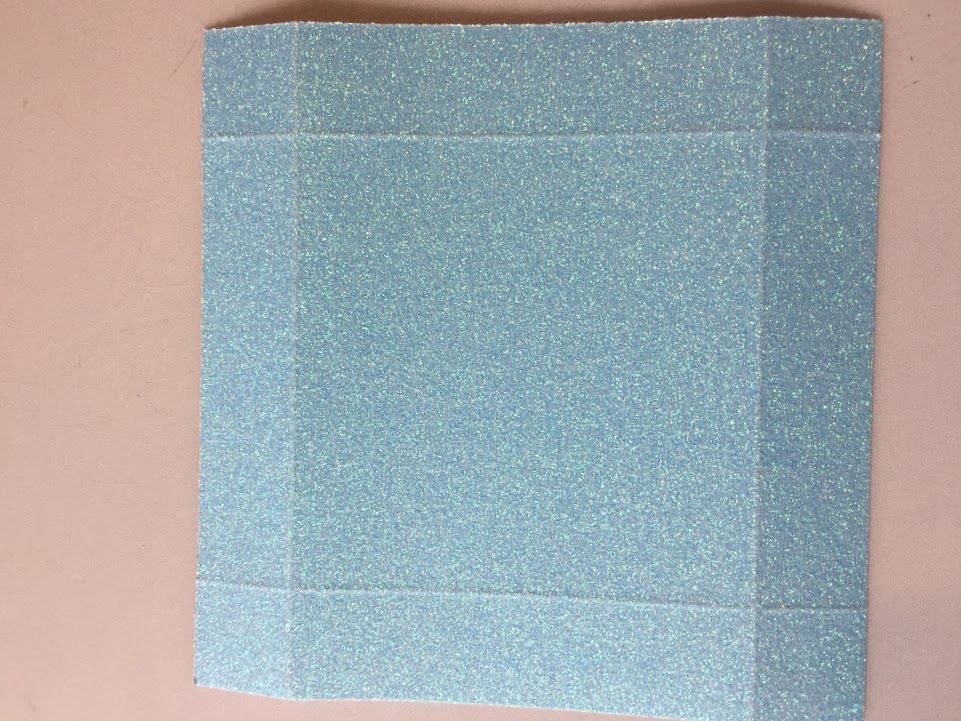
Step 2 Score the layer using a bone folder.
(Refer
to the graphic = score at 4” and 8” on both sides)
|
 |
Step 3 Cut out the
4 corners
|
 |
| Step
1 Cut the Glitter Cardstock GCS067 (6
1/8” * 6 1/8”) |
|
|
 |
| Step
2 Score the layer using a bone folder. (Refer
to the graphic = score at 1” for each side) |
 |
| Step
3 Cut the 4 corners like the graphic |
 |
| Step
4 Apply double sided tape or glue to the
end tabs of the cover box. Try to close
the box. |
Step
5 Decorate the box inside and outside. Then
decorate the lid and finish by closing it
 |
| Inside decoration |
 |
| Top of box cover |
|


Comments
Post a Comment